How to Format a Computer Windows XP 7/8/Vista
By formatting, we mean to reformat your internal hard disk drive (HDD) to its factory default which in other words, to a totally clean drive. Everything stored, even the tiniest data will get removed and the space previously used up by them will be freed up.
In this post, we will show you a detailed step-by-step tutorial on how to format a computer of any Windows (Windows 7, Windows 8, Windows 8.1, Windows Vista) with a Windows XP Bootable Disc and install Windows XP onto it. It doesn’t matter what you have in your current HDD, whether it has an already installed OS, or an entirely clean HDD that never been used before, you can use this tutorial to properly format your HDD and install Windows XP on it.
If you have a Windows 8 or Windows 7 bootable disc instead, you can still refer to this tutorial as most steps will still be the same. Please be warned that this attempt about formatting a computer is only for advanced and pro users who know exactly what they are about to do. Formatting may also void your warranty if your computer, especially a laptop or a notebook computer, is still under a warranty protection. Backup everything before you continue and please proceed at your own risk.

Format a storage drive, or in other word, disk formatting, is the initial part of the process for preparing a hard disk or other storage medium (any drive that has storage) for its first use. The disk formatting includes setting up an empty file system. A disk formatting may set up multiple file systems by formatting partitions for each file system. Disk formatting is also part of a process involving rebuilding an entire disk from scratch.
In most cases, when people want to get rid of very bad viruses or spywares, or other problems that slow down or crash their computer, formatting the computer can usually be the ultimate and probably the best solution if they can’t fix their problem. Formatting a computer can also mean ultra cleaning the computer which wipe out everything and let you install a clean, new and fresh OS into it, and start everything from scratch.
How to format your computer with a Windows XP bootable disc
First Step – Windows XP Bootable disc to Format a Computer:
As stated, you’ll need a windows XP disc. To format a drive and install Windows XP, no matter what form your Windows XP is, it must be a physical and genuine Windows XP bootable disc. If you downloaded it from the internet which is probably a disc image (.iso or whatever image format), you’ll have to burn the image to a CD. The key is that you’ll need to boot the CD without booting your hard disk.
Second Step – Backup before Formatting Computer Windows XP:
Not to mention much about how clean your disk will be after formatting, you should know that everything will be gone after formatting your hard disk. So, we encourage you to do a complete backup for your computer. Copy important documents, photos, videos or whatever files you want to keep. You can save them into your thumb drive, external hard drive or whatever storage hardware that allows you to store your files temporary.
3rd Step – How to boot a Computer with Windows XP disc for formatting:
When you have done all appropriate backup and have your Windows XP bootable disc prepared, you are ready to do this. Now, put the Windows XP disc into your CD-ROM drive, and restart your computer. In this step, you’re going to set your motherboard to boot your CD first instead of your hard disk. To do this, go into the BIOS settings, by pressing delete, f1, f12 or whatever button that the screen shows you at startup, usually with the words “To enter setup press …”. You have to press it quickly, or you can just spam the button immediate after your computer starts. Different BIOS might have different settings and menus. Try to navigate all the menus in the BIOS settings and seek for the phrases boot order, first boot device, second boot device or any phrase that indicates boot sequence or order. When you see it, set CD-ROM drive as your first boot device. Save the settings and restart your computer. When it says press any key to boot from cd, hit enter and it will then boot your CD.
4th Step – How to Format a Computer with Windows XP:
A blue screen will appear and you will have 3 options:
- To set up Windows XP now, press ENTER. – We’ll pick this in this case.
- To repair a Windows XP installation using Recovery Console, press R. – This is only for people who crash their computers until a stage where the windows cannot even be loaded. This option can help them to recover their computer to an earlier restore point.
- To quit Setup without installing Windows XP, press F3. – If you change your mind, this option is for you.

5th Step – Formatting a Computer with Windows XP:
On the Windows XP Licensing Agreement page, press F8 to agree the license and go to the next step.

6th Step – Formatting your Computer and install a fresh Windows XP:
Obviously, if you want to format your hard disk and install a fresh copy of Windows XP, press ESC.

7th Step – Format Windows XP create or delete unpartitioned space:
Please take note that this is a very important step. Please read carefully. In this screen, it will show you all the existing partitions you have in your hard disks. You will usually see a few partitioned spaces that you’ve been using previously. Deleting a partition means to completely wipe out everything in the partition. If you’ve decided to completely wipe out everything, you can just delete all the partition by pressing D and then L. As for some power users, they will format only one partition which is usually the partition where its previous system is located. That way the data on the other partition will be safe. After you’ve done deleting all the partitions, you should now see an unpartitioned space. You can create as many partition as you want in the unpartitioned space. To do so, press C, input the size you want for the new partition, and hit enter to confirm. Select the partition where you prefer to install Windows Xp and press Enter. If there is no partition created, it will create one that uses the maximum size of the unpartioned space for you when you hit ENTER directly while selecting the unpartitioned space.

8th Step – NTFS FAT Non Quick Format Windows XP Partition file system:
This page allows you to select a file system for the new partition to be formatted. The best file system is the NTFS file system. We’ll usually pick that.

9th Step – Wait for the Format Windows XP to complete:
Get yourself a cup of coffee and wait for the formatting process to be completed. Windows XP is now erasing your hard disk drive using a process called formatting and will start the installation upon completion of the formatting. You can leave your computer and return in 20 to 30 minutes. The computer will restart several times and will boot from cd again. Do not press anything on the keyboard and just let it go through all the stages of setup until it prompts you something that requires your decision. From now on you just have to follow the prompts, pressing all the “Next” and let the setup goes on. Make sure you have your Windows XP serial number ready when the setup ask for it. This can be found usually from the back cover of your Windows XP CD case or your COA certificate which is a sticker sticked behind on your laptop. Do not remove the Windows XP CD until the computer has done all the installation and started up with a new desktop and some new icons.

10th Step – Completed Formatting a Computer Windows XP 7/8/Vista:
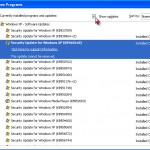
Not related to the formatting process. When you’ve completed 9th step, you are considered done with installing a fresh copy of Windows XP. What you will have to do now is to correctly install your hardware drivers in order for them to function properly. You will need to look for your motherboard driver CD that comes with your mobo. Install the LAN before you can access the internet. When you can finally access to the internet, search for the latest driver for your hardware instead of using those in some old CDs. If you’ve installed Windows 8 or Windows 7, Windows Update will do everything else for you.