How to Change System Locale Display Language Windows 8/7
This tutorial shows you how to change the Display Language to run Non-Unicode Programs such as Chinese programs by changing the System Locale accordingly in Windows 8/7/Vista/XP.
Some programs may not be able to show to texts correctly if your Windows system locale wasn’t set to match with the program’s language. For example, the texts including those on the menu bar or the content of a Chinese software may appear to be cluttered, messed up or showing random characters that don’t make sense. Well, if that’s the case, you will have to change the system locale to the language that the software support.
![]()
Before changing system locale to match the display language of a software
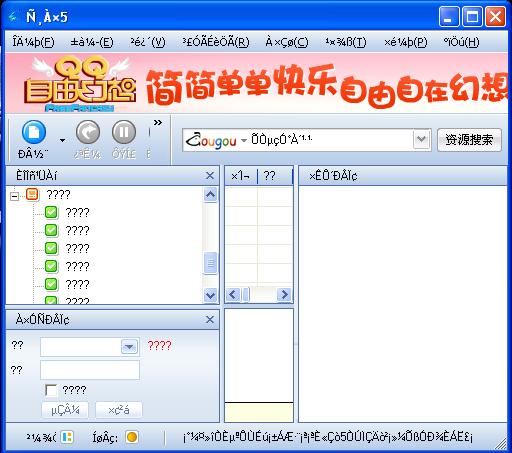
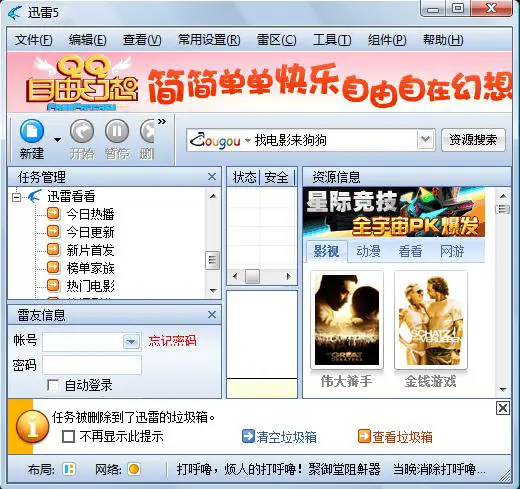
The screenshot below is a popular Chinese software called Thunder Downloader. The texts were supposed to be in Chinese characters, but they appeared to be random messy characters because the language set in system locale isn’t supported by this software’s display language.
After changing system locale for the software to display language correctly
The image below is how Thunder downloader supposed to look like if your Windows system locale is set to a display language that the software support. If you have similar problem in any other software, use the method below to change your system locale to the correct one so that your software can display its language properly.
How to Change System Locale Display Language Windows 8/8.1
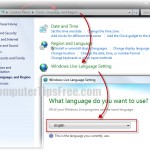
First, access to your Control Panel by going to Start (metro), search for control panel. Select Clock, Language, and Region from Regional Language Setting. Select Language in the next screen. From the sidebar on the left, select Advanced Settings. To change your system locale display language of your entire Windows 8 system, select your desired language under “Override for Windows Display Language”.
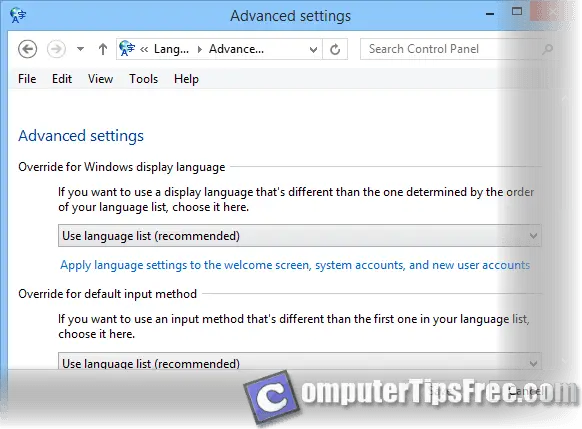
By default, if you are using the “Use Language List” which is the default recommended setting of Windows 8, Windows will be able to display most languages for almost every software that supported it. If it doesn’t help to use the default setting, you may just change to your desired language and override the Windows display language. Please take note that changing this setting may affect other programs that needed the previous language you’ve set. You are advised to change the system locale accordingly and revert it back to the default “Use Language List” after you’ve done using the software.
To change the system locale in Windows 7/Vista:
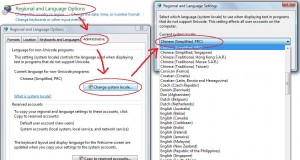
Select Control Panel from the Start menu. Select “Clock, Language and Region”. Then click on “Regional and Language Options”. A small window will show up, click on Administrative tab. Under “language for non-unicode programs”, click on Change System Locale button. Under “System current locale”, select the language from the drop-down list that meets the needs of your non-unicode programs.
To change system locale in Windows XP:
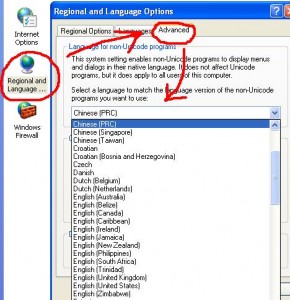
Select Control Panel from the Start menu. Double click on “Regional and Language Options”. Click on the Advanced tab. Under “System current locale”, select the language from the drop-down list that meets the needs of your non-unicode programs.

