How to Remove Autorun.inf Virus From USB
Virus infection through USB drives is one of the most annoying and most talked about case in the computer world. When someone plug his/her infected USB drive (A flash drive, thumb drive, or more often known as a Pendrive) into your computer and if the USB autorun option is enabled in your PC, your computer may instantly get infected by the virus contained in the USB drive which spread from the autorun.inf file.
Most of the common USB viruses can spread very rapidly that it’s so difficult to even trace it or stop it. In some serious cases, people will have to format their PC as the virus has already corrupted their Windows system core files. Below is a list of the most famous USB viruses in Windows 8, 7, Vista and XP:
- Autorun.inf
- Ravmon.exe
- New Folder.exe
- svchost.exe
- Heap41a
- Flash_Disinfector.exe
- boot.exe
- 3B_password_viewer.exe
- iph.exe
- unvise32.exe
- bad1.exe bad2.exe bad3.exe
- msmsg.exe
- system.exe
- newfolder.exe
- how to remove Autorun.inf using cmd
- others… In the comment section below, share with us the viruses you’ve been infected with and we’ll add them here
Before proceeding to any solution, when you plug in your USB drive
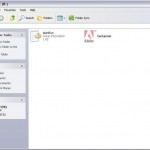
Whenever you plug an USB drive into your computer, a window will appear similar to the one shown below (depending on the version of your Windows):


To prevent your computer from running any file in the plugged USB drive, click the red-cross sign or cancel button to close the autorun window. Then proceed to any of the solutions provided below:
How to Remove Autorun.inf Virus From USB: Install an Antivirus Program
If you don’t have an antivirus program, it’s essential for you to install one. This is in fact the most effective and the most recommended way to scan and remove any virus contained in your USB Drive automatically. If you have an antivirus software installed, right click your USB drive from My Computer window, click Scan E: (or any alphabet that represent your drive) to scan for viruses and remove them.
Remove Autorun.inf Virus: Remove the virus manually
After canceling the autorun, open cmd from Start -> Run. In the command prompt type the drive letter: (for example, e:) and press enter. Next, type dir /w/a and press enter. This will display a list of the files currently exist in the pendrive. Check whether if there’s any suspicious file or file that exist unexpectedly.
Remove Autorun.inf From USB : Disable autorun for all USB devices
For best practice, it’s good to disable autorun feature for all USB removable drives which can potentially carry a virus. To disable autorun feature in Windows 7 or Vista,
- Go to the Start menu, click on Control Panel.
- Double click on the Default Programs icon. If in case you don’t see that icon, find the big word Programs, click it and now you should be able to see the Default Programs icon.

- Click on Change Auto play settings.

- Scroll through the list and locate Mixed Content.
- From the drop down menu, you can choose what action or program you want your computer to run when you plug in your USB device. In this case, we’ll choose take no action.

In Windows XP, you’ll need to install a tool called Tweak UI. Run the tool, navigate to Desktop, My Computer, Autoplay. From there you can disable autoplay for all removable medias.